

Git 相信大家都有所了解,在听完字节青训营老师的课程之后对 Git 又有了进一步的理解,遂在此记录,但若只是记录进阶内容我觉得欠妥,所以这里会将 Git 从入门开始详细介绍。
什么是 Git
Git
以下这句话摘自Git官网
Git is a free and open source distributed version control system designed to handle everything from small to very large projects with speed and efficiency.
Git is easy to learn and has a tiny footprint with lightning fast performance. It outclasses SCM tools like Subversion, CVS, Perforce, and ClearCase with features like cheap local branching, convenient staging areas, and multiple workflows.
简单讲就是说 Git 是一个免费和开源的分布式版本控制系统,速度快,效率高。它优于很多其他类似工具并具有许多强大的功能。
版本控制
从官网的描述中我们可以知道这个工具可以让我们进行版本控制,但是我们为什么需要版本控制呢?这是因为我们需要更好的关注变更,了解到每个版本的改动是什么,方便对改动的代码进行检查,预防事故发生;也能够随时切换到不同的版本,回滚误删误改的问题代码。
在 Git 之前已经有 RCS 这种本地版本控制以及 SVN 类集中式版本控制的工具,但是他们都有较大问题,所以 Git 由此应运而生。
Git 的基本使用
也许大家之前就已经接触过 Git ,了解诸如 git commit git push 等等常见的命令,但是 Git 的命令肯定不限于这些,跟着我的操作一步一步来。
git init
我们先在一个文件夹中进行项目初始化
$  mkdir study
$  cd study
$  git init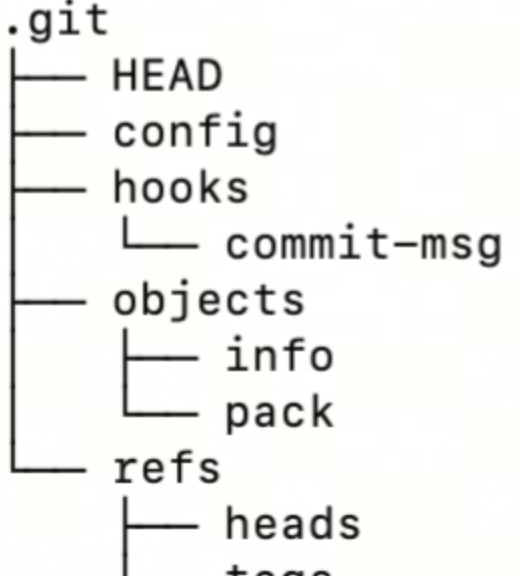
这是初始完毕后的项目结构
git config
我们可以使用此命令进行 Git 配置
用户名配置
$  git config --global user.name "username"
$  git config --global user.email username@email.com
git remote
除了这些基本配置,我们还有一种配置就是 remote 配置,这个表示我们本地和远端仓库的关联信息, remote 一般分为 http 和 ssh 两种,我们首先先看一下如何查看以及添加 remote 。
$ git remote add origin_ssh git@github.com:git/git.git
$ git remote add origin_http https://github.com/git/git.git
$ git remote add origin git@github.com:git/git.git
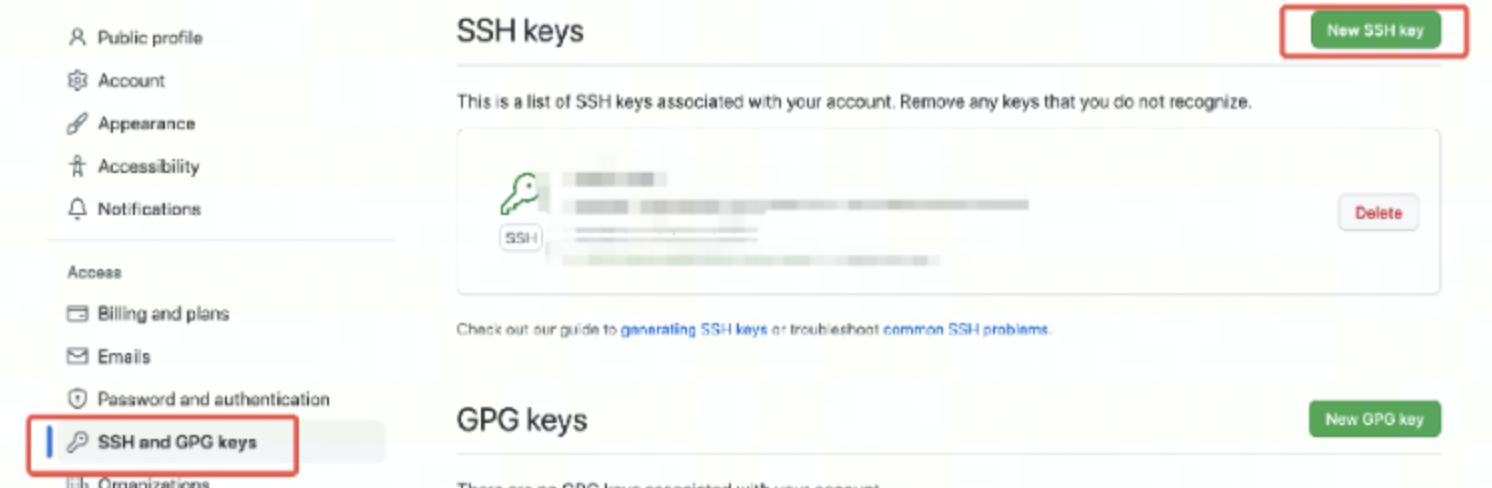
$ git remote set-url --push origin git@github.com:my_repo/git.git现在都比较推荐 SSH ed25519 ,因为这样的安全系数高一点
$ ssh-keygen -t ed25519 -C "llance_24@foxmail.com"
Generating public/private ed25519 key pair.
Enter file in which to save the key (/c/Users/Yuan/.ssh/id_ed25519):
Enter passphrase (empty for no passphrase):
Enter same passphrase again:
Your identification has been saved in /c/Users/Yuan/.ssh/id_ed25519
Your public key has been saved in /c/Users/Yuan/.ssh/id_ed25519.pub
The key fingerprint is:
SHA256:************************** llance_24@foxmail.com
The key's randomart image is:
+--[ED25519 256]--+
| .o.    .o. 66gg |
|  .o  J.  ..  . .|
| 67 . .=       + |
|  .  .+ .       o|
| . . j0 S  .    .|
|  o o .  .      o|
| . + . ..    o o.|
|  + o +...o o.=o=|
| . ..+o=h*.. .+*=|
+----[SHA256]-----+
在 GitHub 中添加 SSH Key
git add
$ touch readme.md
$ vim readme.md
先创建一个文件并且编辑一下
$ git status

$ git add .

$ git status
git add 之后再次使用 git status 命令会看到看到 change 出现
git commit
使用 $ git commit -m "add readme" 提交
git gc
使用 git gc 命令可以删除一些不需要的 objects ,已经会对 object 进行一些打包压缩来减少仓库的体积。
$ git gc --prune=now
Enumerating objects: 7, done.
Counting objects: 100% (7/7), done.
Delta compression using up to 16 threads
Compressing objects: 100% (3/3), done.
Writing objects: 100% (7/7), done.
Total 7 (delta 0), reused 0 (delta 0), pack-reused 0
git clone & pull & fetch
Clone
拉取完整的仓库到本地目录,可以指定分支,深度。
Fetch
将远端某些分支最新代码拉取到本地,不会执行 merge 操作,会修改 refs/remote 内的分支信息,如果需要和本地代码合并需要手动操作。
Pull
拉取远端某分支,并和本地代码进行合并,操作等同于 git fetch + git merge ,也可以通过 git pull --rebase 完成 git fetch + git rebase 操作。可能存在冲突,需要解决冲突。
git push
一般使用 git push origin master 命令即可完成冲突问题。
1,如果本地的 commit 记录和远端的 commit 历史不一致,则会产生冲突
2.如果该分支就自己一个人使用,或者团队内确认过可以修改历史则可以通过 git push origin master -f 来完成强制推送,一般不推荐主干分支进行该操作,正常都应该解决冲突后再进行推送。
推送规则限制
可以通过保护分支,来配置一些保护规则,防止误操作,或者一些不合规的操作出现,导致代码丢失。
Git 参与开发流程
先在自己的 GitHub 中创建一个 demo repo 方便进行接下来的操作
$ git clone git@github.com:your_username/demo.git
Cloning into 'demo'...
warning: You appear to have cloned an empty repository.
拉到本地后我们开始进行进行一些初始化修改
$ cd ./demo
$ vim readme.md
$ git add .
$ git commit -m "add readme"
$ git push origin main
至此我们就已经将我们添加的 readme 推到了 GitHub 上,大家可以去自己的库中进行检查。
一般在开发过程中我们是不能再 master/main 分支上直接修改,一般是会在dev或其他分支上进行开发。
$ git checkout -b feature
$ vim readme.md
$ git add .
$ git commit -m "update readme"
$ git push origin feature
现在再回库中会发现我们创建了一个叫做 feature 的新分支,并且对 readme 进行了更新
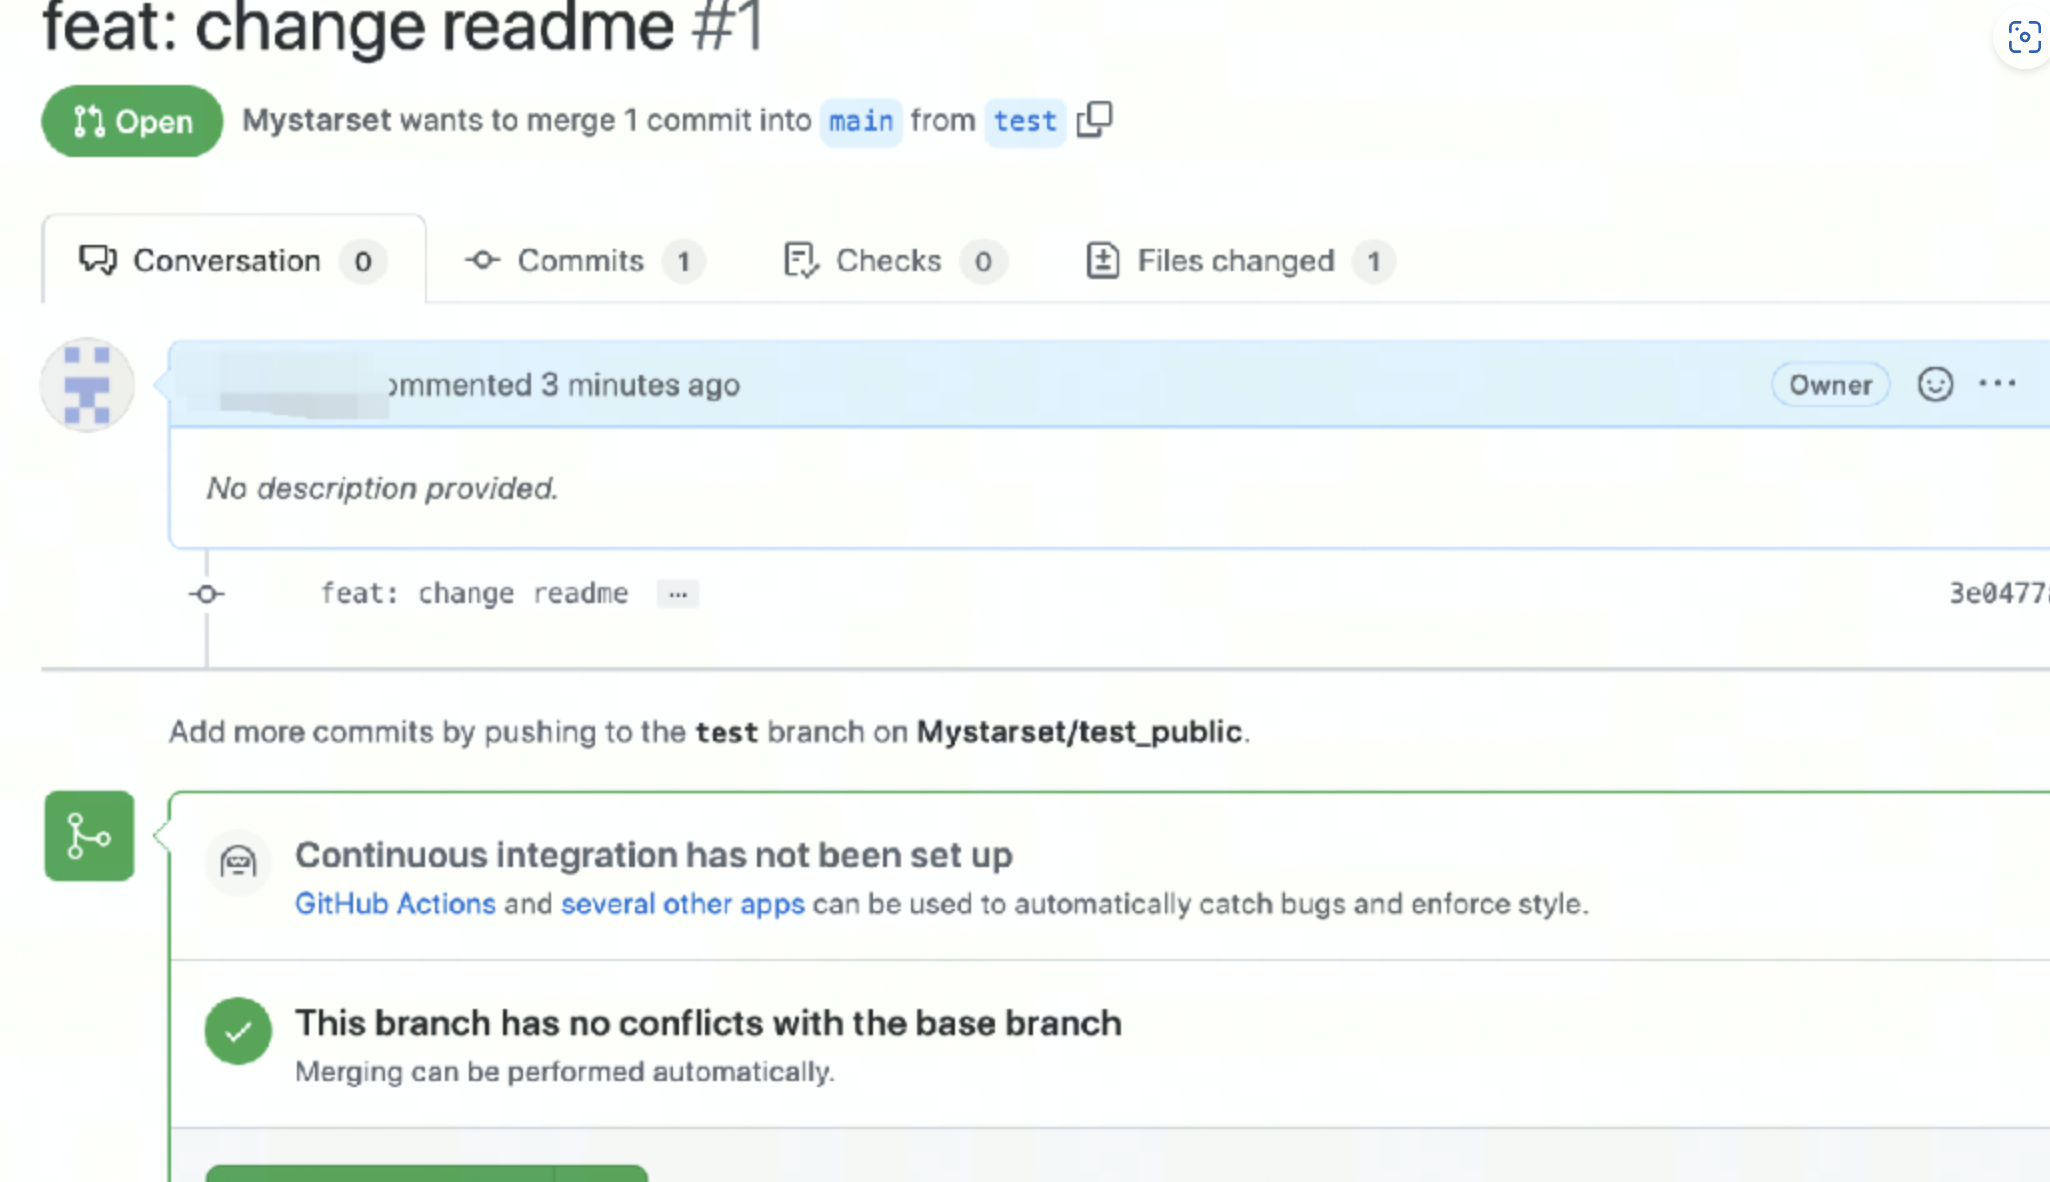
我们可以提交 PR ,申请并入主分支
结语
Git 的使用远远不止这些,大家可以去官网文档或其他地方了解更多的相关操作
我的 GitHub 主页 https://github.com/L2ncE
欢迎大家 Follow/Star/Fork 三连