
前言
在给一个微信小程序写接口的时候使用了 gRPC 来开发微服务。若按照我以前的写法,我会在上面用类似 gin 的相关 HTTP 框架再封装一层,但我又想到如果直接使用 gRPC 自带的 gRPC-gateway 效果会不会更好?在完成大概的框架之后也感觉到了 gRPC-gateway 的好处与开发的快速便捷,所以在此记录一下在 Go 语言中使用 gRPC-gateway 开发的方法。
gRPC
什么是gRPC
在这里借用官网的说法
gRPC 是一个现代开源的高性能远程过程调用 (RPC) 框架,可以在任何环境中运行。它可以通过对负载平衡、跟踪、健康检查和身份验证的可插拔支持有效地连接数据中心内和跨数据中心的服务。它也适用于分布式计算的最后一英里,将设备、移动应用程序和浏览器连接到后端服务。
gRPC is a modern open source high performance Remote Procedure Call (RPC) framework that can run in any environment. It can efficiently connect services in and across data centers with pluggable support for load balancing, tracing, health checking and authentication. It is also applicable in last mile of distributed computing to connect devices, mobile applications and browsers to backend services.
gRPC-Gateway
etcd3 API 全面升级为 gRPC 后,同时还要提供 REST API 服务,维护两个版本的服务就显得不太合理,所以 gRPC-gateway 诞生了。通过使用 protobuf 的自定义 option 实现了一个网关,服务端可以同时开启 gRPC 服务和 HTTP 服务,HTTP 服务负责接收客户端请求,然后将请求信息转换 protobuf 格式作为 gRPC 请求数据,再发送至 gRPC 服务,HTTP 服务等从 gRPC 服务获取响应后再转为 JSON 数据返回给客户端。
使用Go进行开发
为了使文章更易懂,我们并不会使用真实的业务作为例子,仅是简单演示。但也会将每一步解释清楚。
gRPC
首先我们使用 gRPC-gateway 是基于 gRPC 的。我们先创建一个 test 文件夹,并在其中再创建一个 api 文件夹用于存放我们的 proto 文件以及自动生成的文件。
我们在 api 目录下写一个我们的 test.proto 文件。
syntax = "proto3";
package test;
option go_package = "./test/api/gen;testpb";

message HelloRequest{
  string name = 1;
}

message HelloResponse{
  string resp = 1;
}

message SpecificRequest{
  string req = 1;
}

message SpecificResponse{
  string resp = 1;
}

service TestService {
  rpc Hello (HelloRequest) returns (HelloResponse);
  rpc Specific (SpecificRequest) returns (SpecificResponse);
}
其中定义了一个 Test 服务以及两个请求方法,其中 Hello 的逻辑打算是传一个 name 进去我们返回 "Hello, name", Specific 的逻辑是只会放行特定的请求,详细的逻辑我们会在稍后实现。
接下来为了实现稍后的 gRPC-gateway,我们还需要写一个 yaml 文件。
type: google.api.Service
config_version: 3

http:
  rules:
    - selector: test.TestService.Hello
      post: "/test/hello"
      body: "*"
    - selector: test.TestService.Specific
      post: "/test/specific"
      body: "*"
在此之后就可以在命令行执行命令了,我个人更习惯于写一个 build.sh 文件。
protoc \
    --go_out=gen --go_opt=paths=source_relative \
    --go-grpc_out=gen --go-grpc_opt=paths=source_relative \
    --grpc-gateway_out=gen --grpc-gateway_opt=paths=source_relative,grpc_api_configuration=test.yaml \
    ./test.proto
在执行过程中可能会提示说没有插件,需要提前安装好
生成成功后我们的 gen 文件中应该会产生三个新的文件,目前的项目结构如下。
├── go.mod
└── test
    └── api
        ├── build.sh
        ├── gen
        │   ├── test.pb.go
        │   ├── test.pb.gw.go
        │   └── test_grpc.pb.go
        ├── test.proto
        └── test.yaml
接下来我们就在 test 文件夹中再新建一个 test 文件夹实现逻辑,在其中新建一个 test.go 文件。回想我们刚才的逻辑, Hello 是响应"Hello, name",而 Specific 是处理特定请求。
首先我们定义一个 Service 的结构体,之后实现接口。
type Service struct {
testpb.UnimplementedTestServiceServer
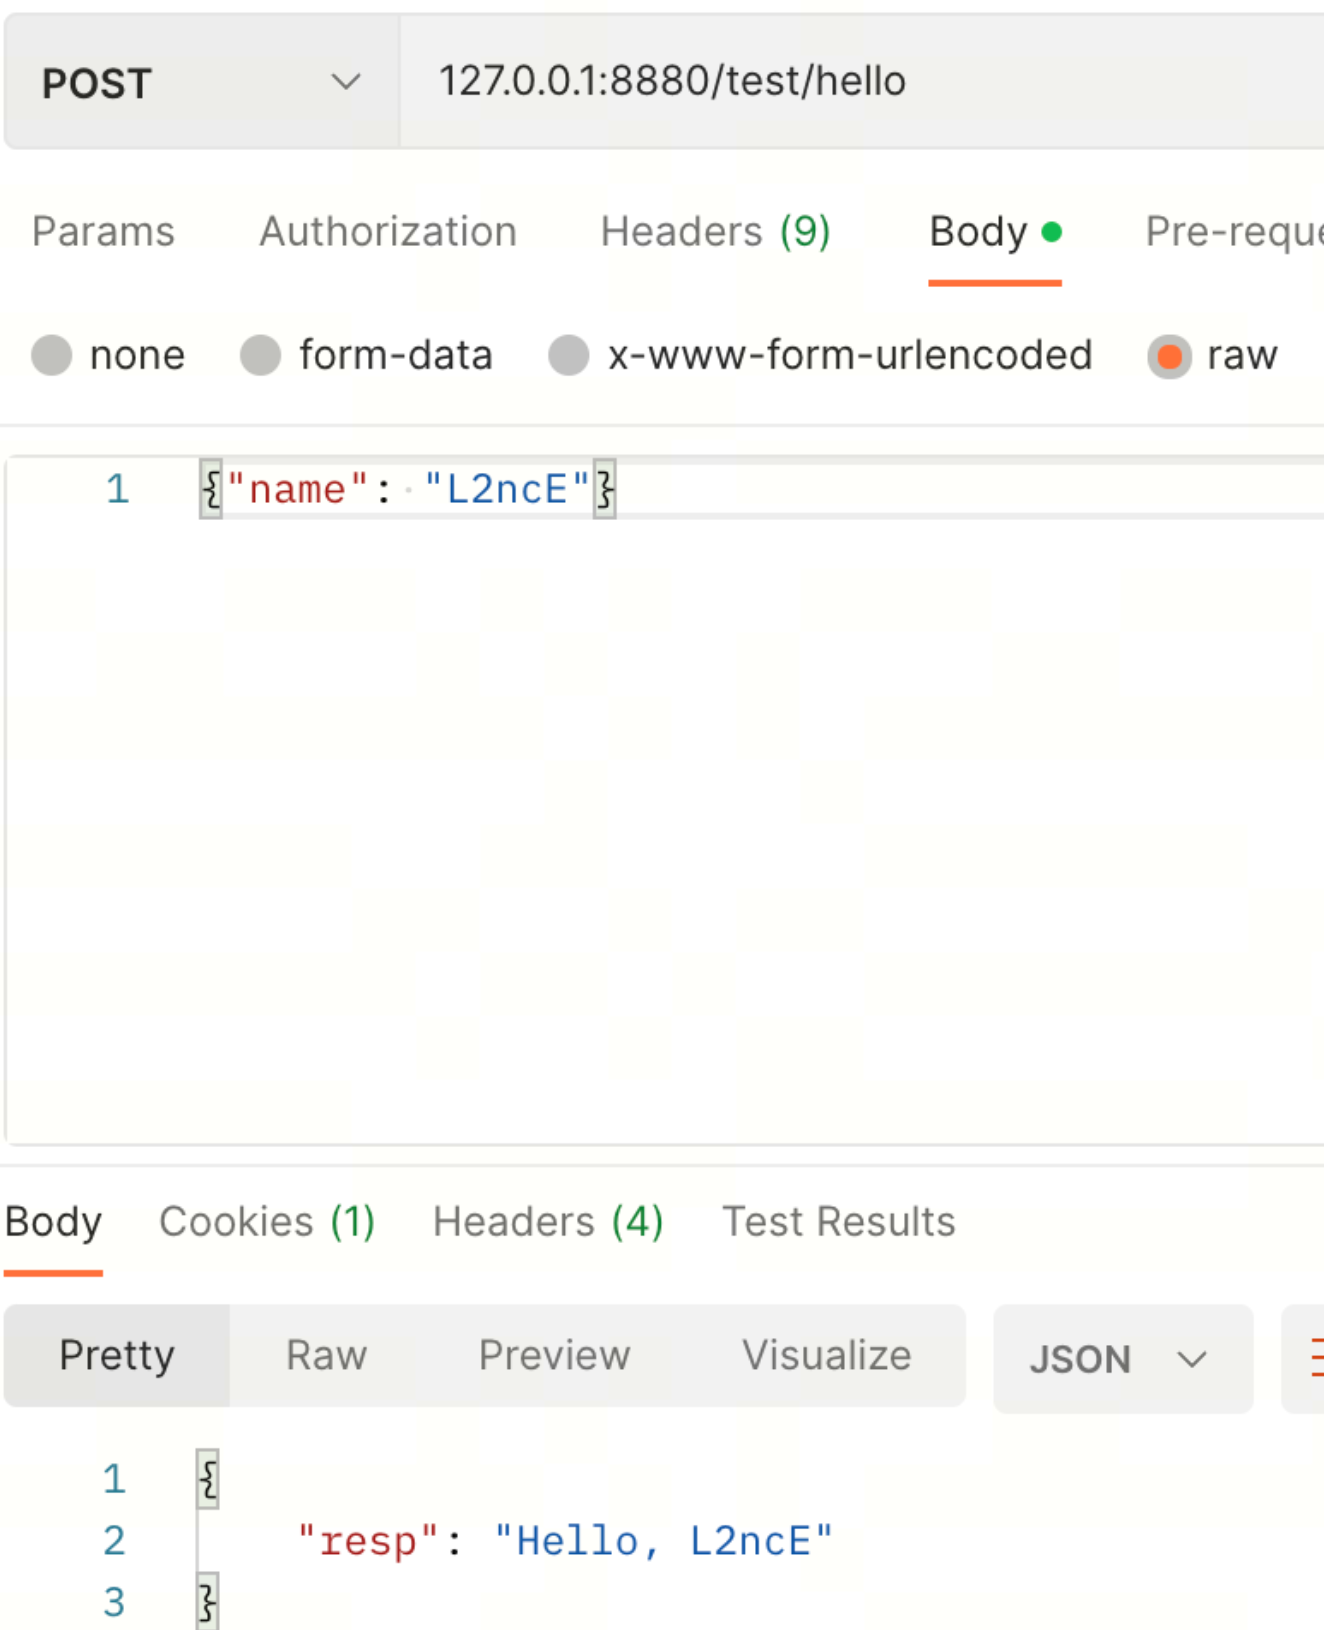
}我们先实现 Hello ,当 name 为空时我们报错,不为空我们传出"Hello, name"。
func (s *Service) Hello(ctx context.Context, req *testpb.HelloRequest) (*testpb.HelloResponse, error) {
if req.Name == "" {
return nil, fmt.Errorf("request is empty")
}
return &testpb.HelloResponse{Resp: "Hello, " + req.Name}, nil
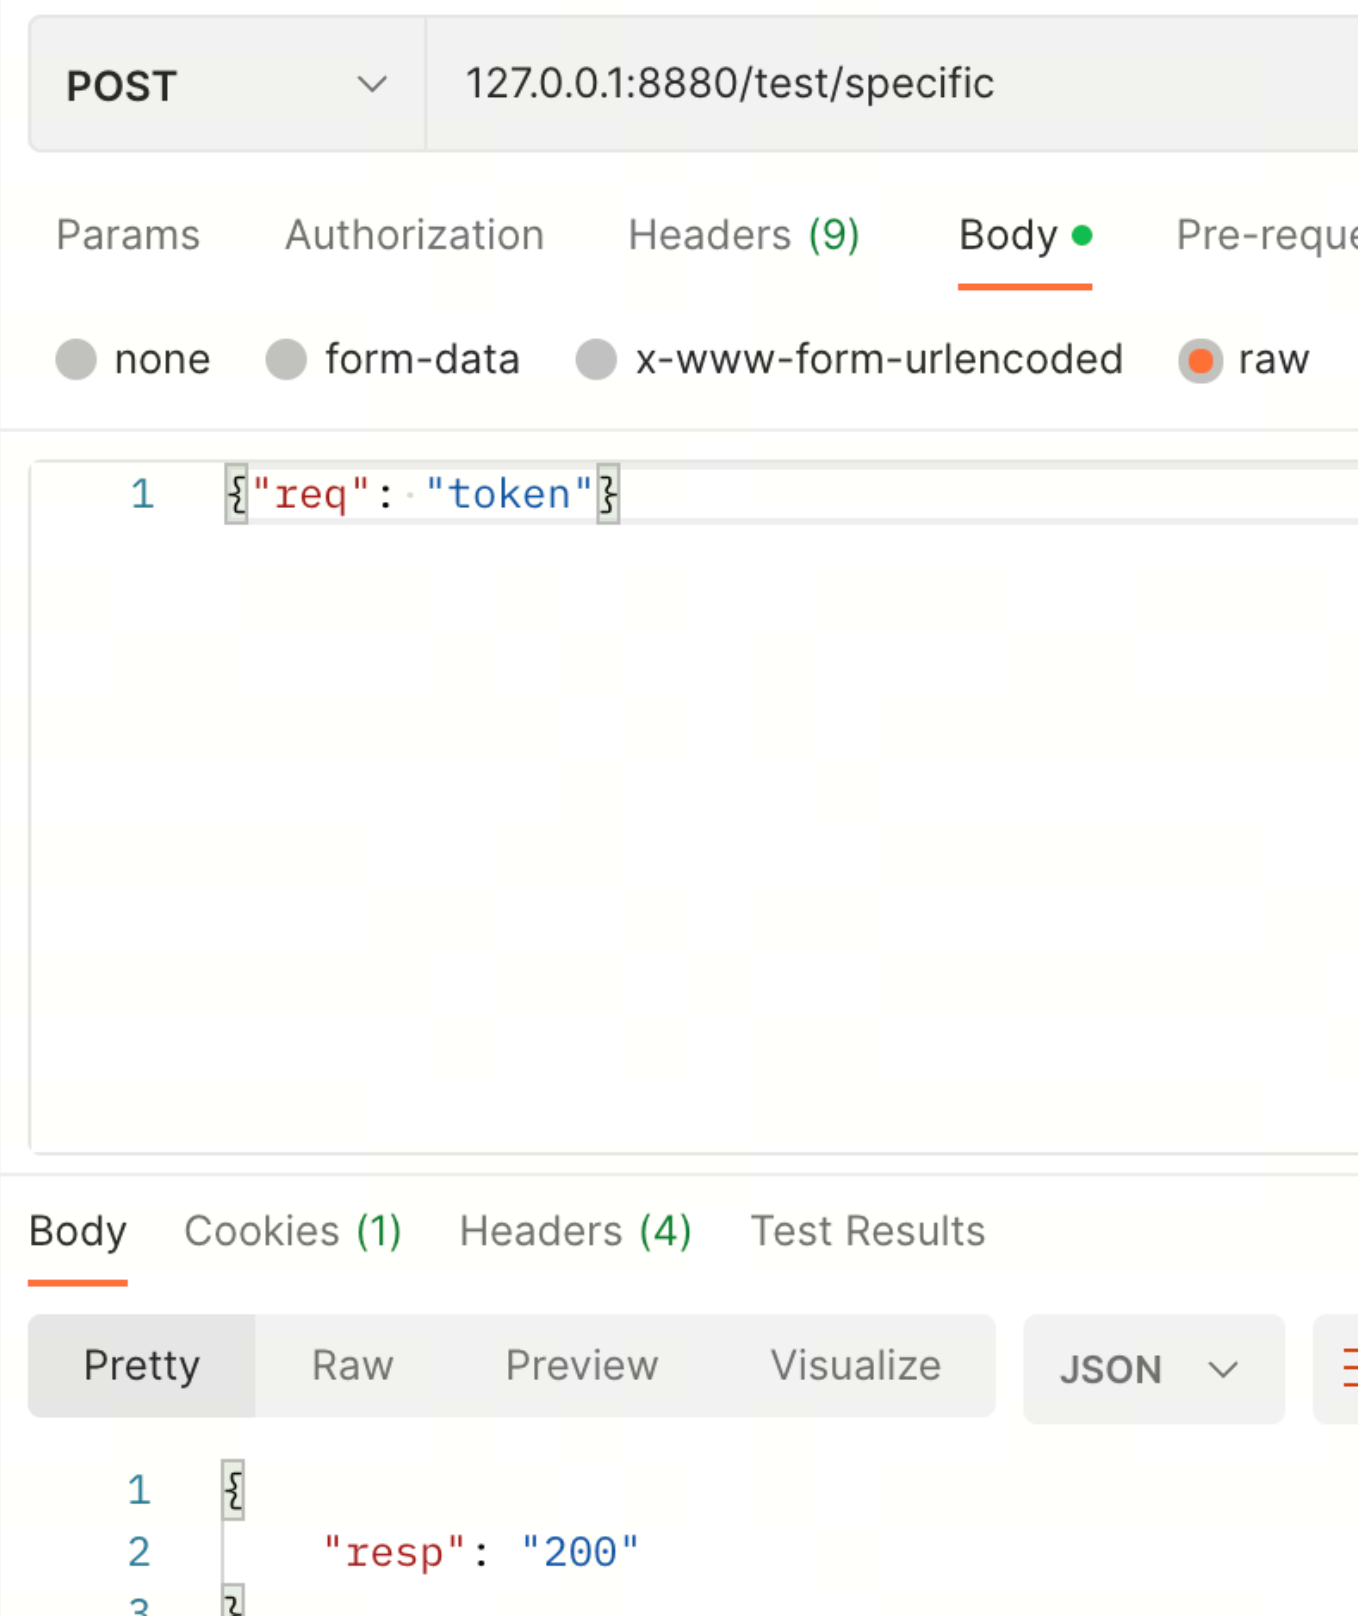
}然后我们实现 Specific,只有传入"token"时我们才会正常响应,否则报错
func (s *Service) Specific(ctx context.Context, req *testpb.SpecificRequest) (*testpb.SpecificResponse, error) {
   if req.Req == "token" {
      return &testpb.SpecificResponse{Resp: "200"}, nil
   }
   return &testpb.SpecificResponse{Resp: "500"}, fmt.Errorf("without token")
}
将接口实现完毕之后就可以在外层 test 文件夹中完成最后一步——写 main.go 文件。
package main

import (
   "log"
   "net"

   "google.golang.org/grpc"
   testpb "grpc-gateway-test/test/api/gen"
   "grpc-gateway-test/test/test"
)

type gRPCConfig struct {
   Addr         string
   RegisterFunc func(*grpc.Server)
}

func main() {
   c := gRPCConfig{
      Addr: "127.0.0.1:8881",
      RegisterFunc: func(g *grpc.Server) {
         testpb.RegisterTestServiceServer(g, &test.Service{})
      }}

   lis, err := net.Listen("tcp", "127.0.0.1:8881")
   if err != nil {
      log.Println("cannot listen")
   }

   s := grpc.NewServer()
   c.RegisterFunc(s)

   log.Printf("%s server started at %s", "test", c.Addr)

   err = s.Serve(lis)
   if err != nil {
      log.Println("server started error", err)
      return
   }
}
最后将其跑起来即可。
gRPC-gateway
在项目根目录新创建一个 gateway 文件夹并在其中创建一个 main.go。
在这里给大家提供一个可以复用的模板,若需新加服务,仅需要在 serverConfig 中添加服务信息即可。
package main

import (
   "context"
   "log"
   "net/http"

   "github.com/grpc-ecosystem/grpc-gateway/v2/runtime"
   "google.golang.org/grpc"
   "google.golang.org/grpc/credentials/insecure"
   testpb "grpc-gateway-test/test/api/gen"
)

func main() {
   c := context.Background()
   c, cancel := context.WithCancel(c)
   defer cancel()

   mux := runtime.NewServeMux()

   serverConfig := []struct {
      name         string
      addr         string
      registerFunc func(ctx context.Context, mux *runtime.ServeMux, endpoint string, opts []grpc.DialOption) (err error)
   }{
      {
         name:         "test",
         addr:         "127.0.0.1:8881",
         registerFunc: testpb.RegisterTestServiceHandlerFromEndpoint,
      },
   }

   for _, s := range serverConfig {
      err := s.registerFunc(
         c, mux, s.addr,
         []grpc.DialOption{grpc.WithTransportCredentials(insecure.NewCredentials())},
      )
      if err != nil {
         log.Printf("cannot register service %s: %v", s.name, err)
      }
   }
   log.Printf("grpc gateway started at %s", "127.0.0.1:8880")
   err := http.ListenAndServe("127.0.0.1:8880", mux)
   if err != nil {
      log.Println("listen and serve error")
      return
   }
}
测试
结语
如果有没弄清楚的地方欢迎大家向我提问,我都会尽力解答
这是我的GitHub主页 github.com/L2ncE
欢迎大家Follow/Star/Fork三连